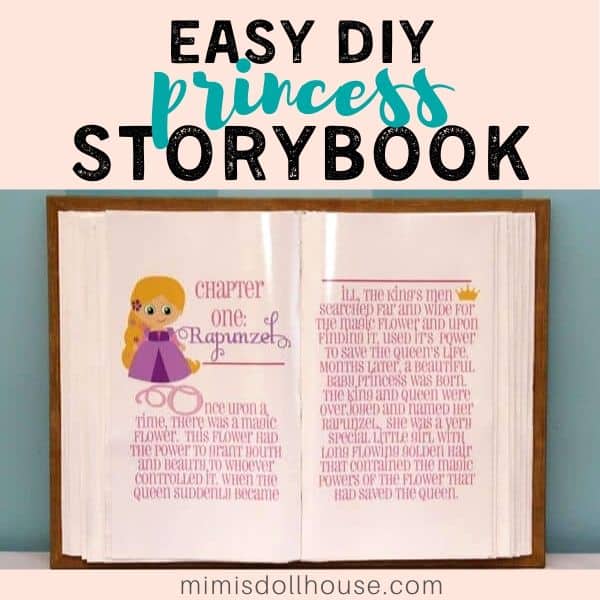
How to make a giant princess book for your party decorations.
Princess Party: DIY Giant Storybook Tutorial. Here’s an easy tutorial for making a large storybook prop or backdrop for your princess party. This easy project gives you everything you need to create a fun book prop for your party.
Looking for more princess party ideas? Check out this princess party, this Disney inspired princess party, these princess party games, this Frozen princess party, these princess dress ideas and this princess crown tutorial!
My daughter was adamant that she wanted “HER princesses” to be the theme of her party. She is very opinionated about parties, especially her own. I guess it comes with the territory when you have a party planning mom:)
Throwing a PRINCESS PARTY?
☑️ This Disney Princess Party Kit is the perfect set to get your party planning headed in the right direction!
In trying to create the perfect princess party palooza for her, I really wanted to focus on something unique.
There are tons of princess parties out there, each one special and unique. We opted for the princess stories themselves to be the focal point of the princess party. Each princess’ story is woven through the party decor, food, colors, etc.
It made sense to me to have an actual storybook be the center of the table. So we (ok, my handy, crafty husband) made a giant storybook to display.
Storybook Tutorial Materials:
- Framed Cork Board (17″x23″ to 18″x24″)

- Foam Sheets 12-Inch by 18-Inch, any color
- rubber cement
- scissors
- craft knife
- White paint
- paint brush
Storybook Tutorial Instructions:
- Cut 2 sheets of the foam to fit side by side and cover the cork, the border will be the cover of the open book
- Using the rubber cement, glue these two sheets to the cork
- Cut 10-14 foam sheets to fit over the original 2 sheets
- Using the rubber cement glue these sheets on top of the original 2 but overlap the new sheets (pictures show white glue…rubber cement will work better!) where the “spine” of the book would be. This builds up the middle section of the book and allows pages to be staggered at the edges

- Allow glue to dry
- Once rubber cement is dry, cut a “V” shape along the spine where the pages overlap

- Take the remaining 2 or 3 pages (each side) and glue the edges at the bottom of the “V” cutout
- Glue the rest of these pages over the top of the stack of glued pages, making the pages curve as you glue them down, you may need to trim some off of the opposite edge so these pages will stagger with the pages underneath
- Allow glue to dry
- Once rubber cement is dry, begin painting the staggered edges white (unless all white sheets are used) to make the pages uniform
- Paint the wood with a dark brown or other desired color, let paint dry
- Once the brown undercoat is dry, paint a lighter brown (or other desired color) over the undercoat, using a dry brushing technique
- Once all paint is dry, trim and glue the printed pages on top of the foam sheets being sure to glue the inner edge into the bottom of the “V”

- Allow to dry and display your work of art:)
If you enjoyed this storybook tutorial, be sure to check out the Castle Tutorial, Crown Tutorial, and Storybook Tutorial that coordinate with this design. Looking for more princess party ideas? Check out this princess party, this Disney inspired princess party, these princess party games, this Frozen princess party, these princess dress ideas and this princess crown tutorial!
Here are some helpful links for throwing a princess party:
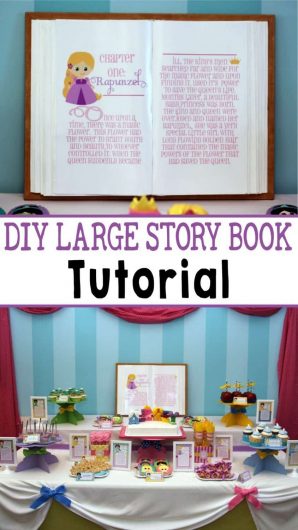
If you love this tutorial, please pin this image to your birthday Pinterest board:


Wanna throw a Princess Party?
The Printable Storybook Princess Party Collection is available in my shop:
RELATED POSTS FOR Easy Storybook Tutorial:
- Olaf Themed Frozen Party
- DIY Frozen Olaf Oreos
- Descendants Party Ideas
- Trending Party Themes for Girls
- Shabby Chic Princess Party Ideas
- Snow White’s Candied Apples Recipe
- Princess Party Games and Activities
- Amazing Disney Princess Dresses
- Disney themed Princess Party
- Princess Crown Tutorial
- Once Upon a Princess Party
- DIY Princess Hats
- DIY Princess Castle Tutorial


do you sell this storybook, and the mini princess stories in the frames?
Do you sell the PDF for the storybook? I was looking at your storybook party package but it doesn’t look like it includes the PDF for storybook.
Your blogger has a lot of effort and enthusiasm. 온라인포커게임추천
Our homepage also has a lot of information. Thank you for visiting. Thank you.
Appriciable article, We at Property Hunters shifted this service to a level much higher than the broker concept. you can see more details like this article Property in pearl qatar