DIY Decor: Paper Starbursts Tutorial. Here’s a quick and easy tutorial for making awesome paper starbursts. Be sure to check out all of our party and craft tutorials.
Sometimes an idea is so simple its amazing…
So, I’m not much of a peanut butter eater. Never really been my thing. My girls on the other hand. They can’t get enough of the stuff. One sure fire way to get my sometimes picky eaters to have lunch…oh it’s the PB&J. I always hated making PB&J though. The peanut butter sucked to spread and I always broke the bread trying to do it. So one day my hubby starts laughing at me getting seriously ticked at a sandwich and he says “use the back of a spoon, not a knife.” So….I used a spoon…Mind. Officially. Blown. So easy, spreads perfect, no more messed up bread.
See…simple=amazing.
This is also how I feel about paper starbursts. They are so crazy easy and perfect for insta-party decor or cheap backdrops. Today, I’m gonna show you how…
Materials:
- Scrapbook Paper
- Hot Glue

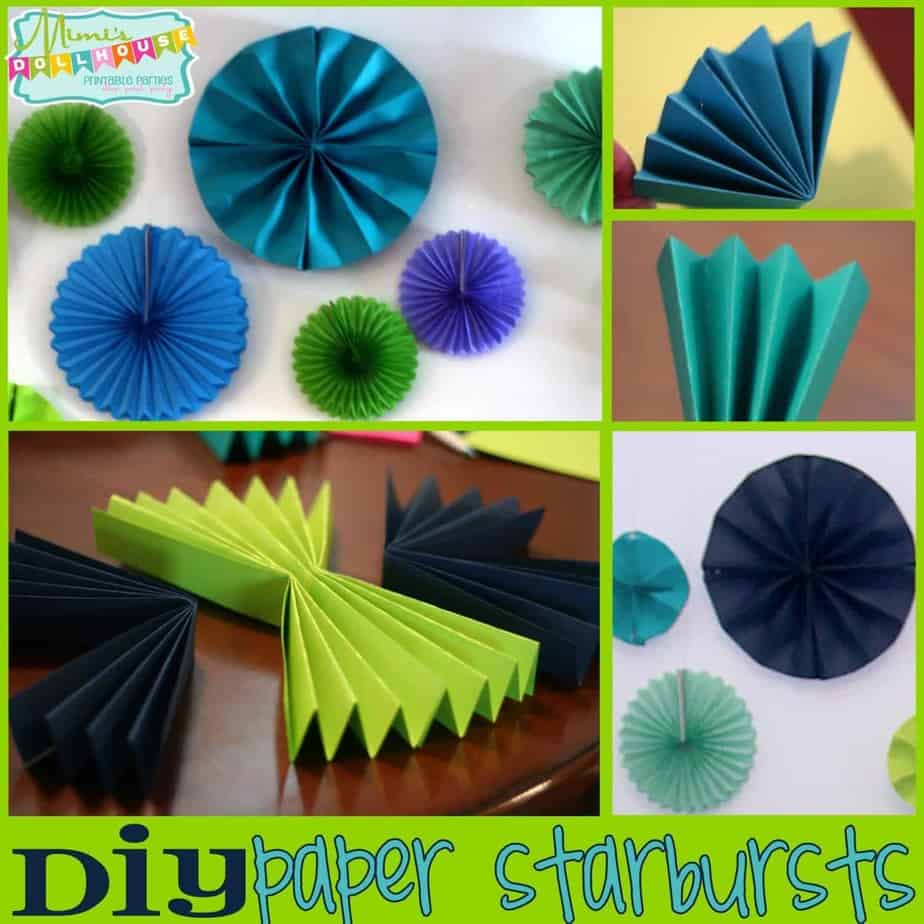
Step One:
Fold the Scrapbook paper in half and then again and then into equal parts (like you are making a paper fan). For a large starburst, use two full sheets of scrapbook paper. For a small starburst, cut the one sheet in half once folded.

Step Two:
Fold the folded paper in half. Glue the two middle pieces together with hot glue to make a triangle. Repeat with the other piece.


Step Three:
Glue the two triangle pieces together to make a circle. Easy peasy!!


The best part of using scrapbook paper for your starbursts over the generic tissue paper starbursts is choosing your own paper. You can pretty much use ay cute paper you want…so get creative.

These starbursts were from the Kitchen Bridal Shower I threw two years ago. Lovin’ it!


Trackbacks/Pingbacks